Summer is the perfect time to give your home a fresh new look, and one of the best ways to achieve that is by replacing your window and door trim using the versatile wood removal tool. Not only will it improve the appearance of your home, but it can also improve its energy efficiency by sealing any gaps that may be present.
To make the process even easier, use the 10-inch Self-Prying Bar. This pry bar hand tool has many uses. It can be used to remove trim from doors, windows, and walls!
In this step-by-step guide, we’ll walk you through the process of removing and installing trim utilizing the 10” Self-Prying Bar, the wrecking bar tool.
Step 1: Gather Materials
Before you begin, make sure you have all the necessary materials. You’ll need:
- 10-inch Self-Prying Bar
- New trim
- Hammer
- Nails
- Caulk
- Paint (optional)
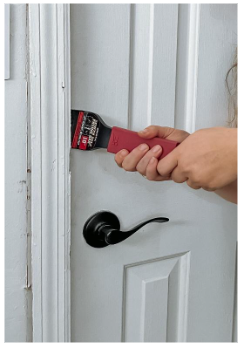
Step 2: Remove Old Trim
Start by using the 10” Self-Prying Bar and hardwood floor removal tool to remove the old trim. Place the wrecking bar tool between the trim and the wall and gently pry the trim away from the wall. Move along the trim, repeating the process until all of the trim has been removed. Use the 10” Self-Prying Bar to remove any stubborn pieces of trim in hard to reach areas.
Step 3: Disinfect the Area
Next, clean the area around the door frame following the removal of old trim. Remove any old caulk or debris from the area and make sure the surface is smooth and clean.
Step 4: Measure and Size New Trim
Measure the area where you’ll be installing the new trim and cut the new trim to the appropriate length. Use a saw or a miter box to make clean cuts.
Step 5: Install New Trim
Place the new trim in position and use the hammer and nails to secure it to the wall. Start at one end and work your way to the other, making sure the trim is flush with the wall and level. Be sure to nail the trim securely, but not so much that it warps or bends.
Step 6: Caulk and Paint
Once the trim is securely in place, use caulk to fill any gaps between the trim and the wall. Allow the caulk to dry completely before painting. Use a paint brush or roller to apply a coat of paint to the trim.
That’s it! By following these steps, you’ll have replaced your door trim in minimal time with zero damage with the all-in-one wrecking bar tool – 10” Self-Prying Bar, giving your home the refresh it needs!
Pick up the 10” Self-Prying Bar now online on Amazon and in-stores at Menards!