
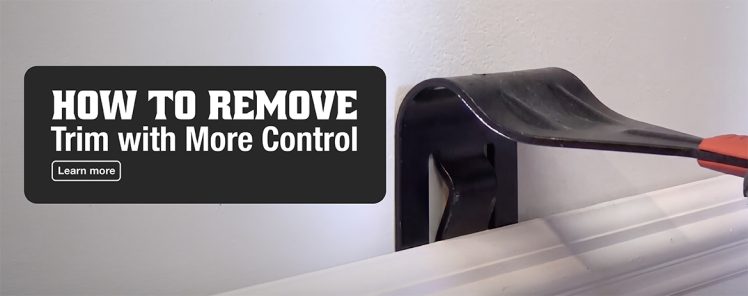
Removing baseboards may look like the easy part of a remodel until cracked trim, damaged drywall, or stubborn nails slow down the project.
The difference often comes down to technique and having the right baseboard removal tool for the job. Traditional pry bars can concentrate force in a small area, making it easier to damage the wall or the material you’re trying to remove. For trim removal and remodeling projects, a tool that distributes force across a wider surface while maintaining control can make demolition cleaner and more efficient.
Whether you plan to replace your baseboards or salvage existing trim for reuse, follow these steps to remove baseboards with greater control.
Step 1: Prepare the Baseboard for Removal
Before you reach for a pry bar, take a few minutes to prep the area. Start by clearing furniture and other obstacles away from the wall. If you plan to reuse the trim, label each piece so you know where it belongs when it’s time to reinstall.
Next, use a utility knife to carefully score the caulk or paint seam where the top of the baseboard meets the wall. This breaks the seal between the two surfaces before you start prying. Skipping this step can pull paint or drywall paper away with the trim, so a clean starting point matters.
Step 2: Start at an Accessible Edge
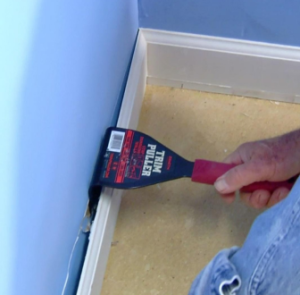
After you score the seam, find an accessible end of the baseboard or a natural gap to start. This is where your pry bar design matters.
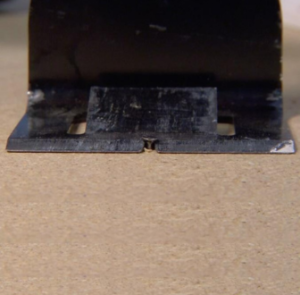
A beveled edge on the ground can make it easier to work the tool between the trim and wall. Instead of applying maximum force immediately, establish a secure starting point and gradually create separation.
For stubborn trim, gently tap the top of the tool with a hammer to help seat the beveled edge. The goal isn’t to rip the baseboard from the wall in one motion.
The goal is to create a controlled opening you can gradually expand.
Step 3: Let the Wedge Create Separation
Once the tool is positioned behind the baseboard, begin gently prying the trim away from the wall. The integrated wedged center helps separate the trim from the wall as you apply leverage. Combined with a wider, flatter contact area, this design helps distribute force across a larger surface instead of concentrating pressure in one small spot.
That added control is especially useful when removing baseboards, molding, door casings, or other materials you may want to salvage, while reducing the risk of damaging the wall behind them. The key here is control: separate first, remove second.
Step 4: Work Along the Baseboard Gradually
One of the easiest ways to crack trim during removal is to pull too aggressively from a single point. Instead, move your trim removal tool farther down the wall and repeat. Work gradually along the material, adjusting spacing based on the trim’s size and condition.
Insert. Separate. Move. Repeat.
Each pass should gradually widen the gap between the baseboard and the wall until you can remove the entire piece. This distributes the force across a larger section of trim and gives you more control over how the material separates.
Step 5: Remove Remaining Nails
Getting the baseboard off the wall doesn’t always mean the job is finished. Nails and other fasteners may remain in the trim, especially if you plan to salvage and reinstall it.
A trim removal tool with an integrated nail extractor helps you move from removing trim to removing remaining fasteners without constantly reaching for another tool. After removing the nails, set the reusable trim aside somewhere it won’t warp or get damaged before you reinstall it.
Step 6: Clean and Inspect the Area
With the baseboard removed, inspect both the wall and the trim. Remove remaining caulk, adhesive, and loose debris. If you’re installing new baseboards, this gives you a cleaner surface to work from. If you’re reusing the existing material, inspect it for cracks, warping, or other damage before reinstalling it.
This is also the time to make any necessary drywall repairs while the area is exposed.
What Should You Look for in a Baseboard Removal Tool?
Technique matters, but tool design can give you more control from the start. For baseboard removal, trim removal, remodeling, and salvage projects, look for a pry bar or removal tool designed around the way materials actually need to separate.
A few features can make a significant difference:
- A beveled edge:
- A wide, flat contact area:
- An integrated wedged center:
- An integrated nail extractor:
- Durable steel construction:
- A shock-absorbing comfort grip:
Helps the tool get between the trim and wall so you can establish a starting point.
Distributes force across a larger surface, giving you more control while reducing damage to the wall and trim.
Helps separate materials efficiently as you apply leverage, without needing a separate shim or spacer.
Helps remove remaining fasteners after you remove the trim.
Provides the strength needed for demanding remodeling and removal projects.
Provides a more comfortable, controlled grip for larger projects.
Together, these features turn a basic pry bar into a more purpose-built tool for removing baseboards, molding, and other renovation materials.
Baseboard Pry Bar vs. Traditional Pry Bar: What’s the Difference?
A traditional pry bar works for general demolition and lifting, but its narrow contact area can concentrate pressure on drywall or trim. A purpose-built baseboard removal tool, such as the Zenith Trim Puller, uses a wider contact area and an integrated wedge center to help separate trim more evenly.
When you want to preserve baseboards, molding, or surrounding walls, these design features provide greater control during removal.
Meet the Zenith Trim Puller
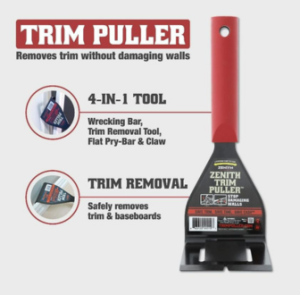
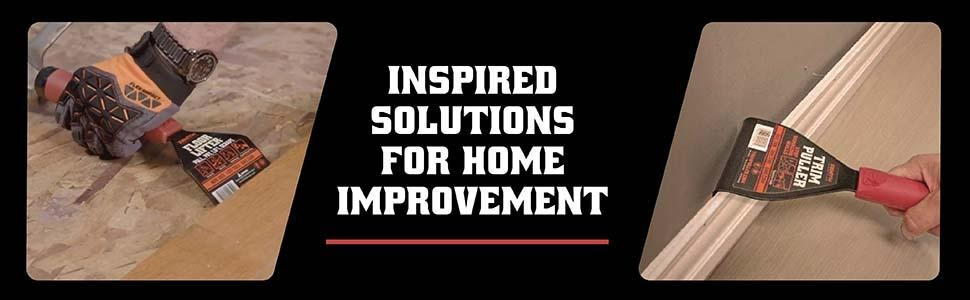
Built for remodelers who want greater control over what comes off—and what stays intact—the Zenith by Danco Trim Puller combines these features into one purpose-built trim removal tool.
Its ground, beveled edge helps the tool get between the trim and wall, while the integrated wedged center creates separation as you apply leverage. Unlike a traditional pry bar that can concentrate pressure in a small area, its larger, flatter, wider contact area distributes force across the material, helping protect both the trim and wall during removal.
Durable steel construction provides the strength needed for demanding projects, while the shock-absorbing handle is designed for greater comfort and control. An integrated nail extractor helps tackle remaining fasteners once the trim comes free. For baseboards, molding, door casings, and decorative panels, the design delivers the strength and control you need from a purpose-built trim removal tool.
Whether you’re replacing trim or carefully salvaging it for the next stage of your remodel, the best tool gives you control over both.
Save time. Save trim. Save cash. Stop damaging walls.
FAQs – Baseboard Removal with Zenith Trim Puller
What is the best tool for removing baseboards without damaging drywall?
The Zenith Trim Puller features a wide, flat contact area and integrated wedge to help remove baseboards while minimizing wall damage.
Can you remove baseboards without breaking them?
Yes. Score the caulk seam and use the Zenith Trim Puller to gently separate the trim from the wall.
What is the difference between a baseboard pry bar and a regular pry bar?
The Zenith Trim Puller distributes force over a wider surface, reducing damage compared to traditional narrow pry bars.
How do you remove nailed baseboards?
Score the paint seam, insert the Zenith Trim Puller behind the trim, and gently pry along the wall to loosen the nails.
Can the Zenith Trim Puller remove crown molding and door casings?
Yes. It is designed to remove baseboards, crown molding, door casings, and decorative panels.